
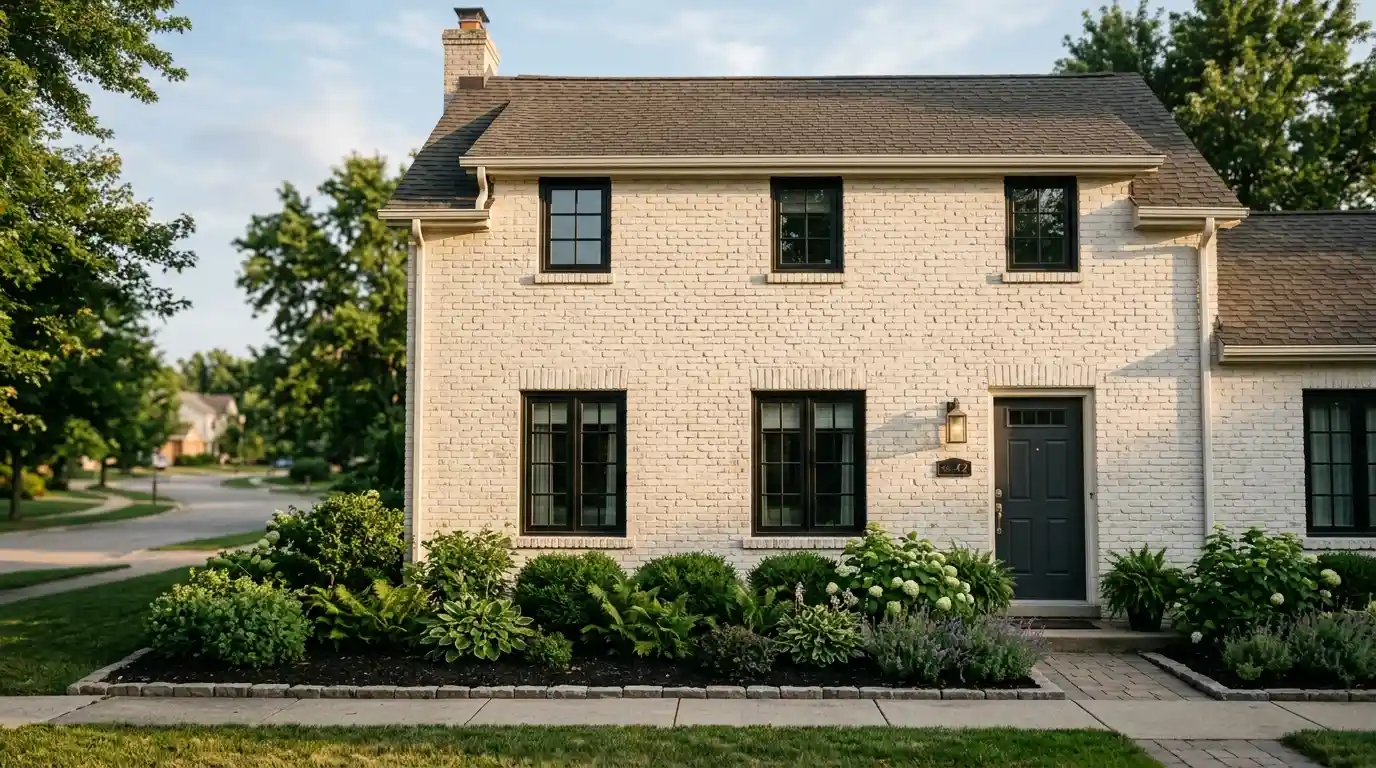
The house I helped with three summers ago had orange 1990s brick the kind that dated the whole facade so aggressively you couldn’t look past it. The owners had been quoted just over $10,000 to have it professionally limewashed. We did it ourselves over two weekends for under $3,000. The difference was real, not just in money doing it by hand meant total control over the dilution ratio, the consistency, how much brick showed through on each section. I won’t pretend it wasn’t physical work, but the limewash transformation was more satisfying precisely because we’d earned it section by section.
That experience taught me more about limewash bricks than any product guide did. So here’s what actually matters before you start.
What Limewash Actually Is — and Why It Behaves Differently From Paint
Most people assume limewash paint is just watered-down regular paint. It isn’t. It’s a mineral-based coating made from crushed limestone, heat-processed into a slaked lime or lime putty, then thinned with water. Sometimes a pigment or tint is added. That’s it. No Volatile Organic Compounds, no synthetic binders which is why it’s genuinely eco-friendly and non-toxic rather than just marketed that way. On an interior application like a limewash brick fireplace or interior accent wall, the odorless, breathable nature is particularly worth noting if you have children or pets.
What makes limewash behave differently from acrylic latex paint or masonry paint is that it doesn’t sit on top of the porous surface it penetrates and absorbs into the brick, eventually calcifying to the surface. Because it becomes part of the masonry rather than forming a layer over it, brick breathes the way it’s supposed to. This breathability is one of the reasons limewash has become a go-to choice in broader exterior renovation projects if you’re updating more than just the brick finish, the drhomey exterior design guide covers how material choices at the facade level connect to the rest of the exterior design decisions .
Trapped moisture is the reason regular paint on brick bubbles and chips after 4 to 5 years a painted exterior that isn’t using a breathable, permeable finish tends to peel within a few seasons in any climate with freeze-thaw cycles.
Limewash vs Whitewash vs German Smear — Getting This Wrong Wastes Time
People use these three terms interchangeably and they’re not the same. Limewash is mineral-based — slaked lime and water, with optional tint and creates a chalky matte finish that develops a soft patina as it ages. It lasts 5 to 7 years on an exterior before needing reapplication and longer on interior surfaces. Whitewash is water-based latex paint diluted with water, usually a 1:1 to 1:3 paint-to-water ratio depending on desired translucency. It’s cheaper and faster but less durable it chips and wears more readily, especially on exterior brick exposed to rain.
German smear, or German schmear, is a mortar wash: a mixture of roughly 70 percent mortar and 30 percent water spread over the brick and partially wiped back before it fully dries. Unlike limewash, mortar doesn’t absorb into the brick it hardens over the surface. German smear is essentially permanent, which is either the appeal or the problem depending on what you want. It doesn’t fade over time but you also can’t change your mind in five days the way you can with a fresh limewash application.
Cost-wise: DIY limewash typically runs $30 to $80 in materials for a small project, with professional limewash starting around $2,000 minimum and $2 to $3 per square foot. German smear professional costs run $1,500 to $3,000 for smaller projects, higher for full exteriors. DIY German smear accent wall work can be done for $150 to $350.
The Absorbency Test That Most Guides Skip Over
Before anything else, check whether your brick will actually accept a limewash coating. Spray a section of the brick with water from a garden hose and watch what happens. If the water absorbs into the brick within a few seconds, you’re working with genuinely porous surface that will take limewash correctly. If the water forms droplets and sits on top, limewash won’t bond properly sealed brick or previously painted surfaces need to be assessed before you go any further.
Brick that has an existing limewash coating, old paint, or a masonry sealer over it will behave completely differently than bare brick. A wire brush and inspection of the mortar joints before you start can save a lot of mid-project frustration.
Getting the Dilution Ratio Right Is Everything
The look you end up with is almost entirely determined by how you mix the limewash. Romabio Classico Limewash the most widely used pre-mixed product in North America and the one that shows up consistently in professional applications comes as a thick concentrated paste. You dilute it by adding water to achieve different levels of translucency. A 50 percent dilution, half a cup of water per cup of limewash, gives a solid, more opaque finish what most people want on a limewash brick fireplace surround or interior exposed brick wall.
A 75 percent dilution gives a lighter result with more brick texture showing through. A 100 percent dilution, or one-to-one ratio, creates the lightest, most translucent application, useful for a subtle chalky finish on an exterior brick house where you want to tone down dated maroon or red brick without covering it completely.
The consistency to aim for is roughly whole milk foamy, pourable, not paste-thick. Mix with a drill with painter paddle attachment rather than by hand. Hand mixing technically works but it takes considerable effort to break down the concentrated limewash evenly, and an inconsistent batch shows up on the wall.
Surface Preparation Decides the Outcome Before You Even Start
Clean brick surface thoroughly first. For an exterior limewash brick project, a power washer or pressure washer is the standard approach it removes dirt, debris, algae, mold, loose mortar, and any deposits embedded in the masonry joints. Let the brick dry completely after washing, and then address any cracks or damaged mortar lines before proceeding. Cracked masonry needs repair before limewash goes on top, not after.If cracks or structural concerns go beyond surface cosmetics — damaged mortar, failing foundations, or water ingress — those belong in a separate conversation about home additions and structural work before any finish is applied.
For a limewash brick fireplace or interior brick wall, a wire brush and soapy water is enough scrub the grout lines and mortar joints, allow full drying time, and inspect for any existing sealers or coatings that would block absorption. Protect everything you don’t want coated: drop cloth on concrete, cardboard or plastic sheeting on wood surfaces, and cover window frames and door trim with painter’s tape or careful masking. Limewash on concrete is notoriously difficult to remove. Don’t skip this step and assume you’ll clean it up later.
Application: The Technique That Makes or Breaks the Finish
Wet the brick with water before applying limewash spray a section at a time with a garden hose or spray bottle so the surface stays damp during application. Wet brick helps the limewash absorb evenly and slows the drying process enough to work properly. On hot days or in direct sunlight, brick dries fast enough that dry sections start absorbing unevenly, which produces patchy coverage. Cloudy days at 50 to 90 degrees are ideal working conditions.
For a large exterior brick house, an 18-inch masonry roller with a 1.25-inch nap is faster than brushwork it gets into mortar joints and grout lines while moving efficiently across large sections. For a fireplace surround, interior exposed brick wall, or limewash brick accent wall, a natural bristle masonry brush gives more control. The Romabio brush specifically is worth the $40 price it covers mortar joints more completely than a generic alternative and makes the process considerably faster.
Apply in thin coats, not thick ones. Work up and down, then side to side, varying brush strokes so the finish doesn’t look mechanical. Between 15 and 30 minutes after application while the limewash is still workable you can rinse certain bricks with a hose to expose more of the original brick texture and create an old world, weathered, distressed look. This is the technique that turns a flat white coating into a genuine aged aesthetic with character preserved.
Two coats on the front exterior, one on less visible sides, is a reasonable approach. Start your test area on a hidden section side or back of the house so you develop your technique and dilution before working on the most visible brick wall.
Durability, Sealing, and the Maintenance Reality
Exterior limewash bricks last 5 to 7 years before the finish starts to fade noticeably. Romabio Classico carries a 20-year warranty when a mineral sealer is applied after the limewash cures particularly along the base of the building, roughly 4 feet up from ground level, where consistent rain and snow exposure is highest. Without the sealer, rain washing against the base of the house is where fading begins first.
Don’t use the finished surface for at least two full days after application if rain is forecast. Limewash is dry to the touch within hours but hasn’t cured properly in that window, and a hard rain before it sets can wash sections unevenly. Inside, limewash brick fireplace finishes last considerably longer since they’re not exposed to weather — a limewashed interior fireplace surround can look good for a decade or more with minimal maintenance.
If you change your mind within five days of application, limewash can be removed with a hose and a brush this window is one of the genuine advantages over German smear or painted brick, both of which are effectively permanent decisions once dry.
The Cost Case for Doing It Yourself on a Dated Brick Exterior
The math on DIY limewash bricks is one of the more compelling cases for doing the work yourself. For context on how limewash sits within a full exterior renovation budget, it helps to have a sense of what other exterior upgrades cost alongside it the vinyl siding cost breakdown on thedrhomey is a useful comparison point if siding is also on the list. Professional limewash on a full house starts around $2,000 and commonly runs much higher the $10,000 quote that started my involvement with that orange-brick project isn’t unusual for larger two-story homes.
The materials for a full DIY exterior run anywhere from $2,800 on the higher end down to considerably less on a smaller brick ranch house. A 50-pound bag of hydrated lime from a hardware store costs under $8. Romabio Classico is more expensive but comes pre-mixed and is significantly easier to work with consistently, especially for a first-time limewash project. For an interior accent wall or fireplace surround, the DIY cost drops to $30 to $80 depending on surface area genuinely one of the more affordable brick makeovers available without touching the structure itself.
Conclusion
Limewash bricks reward the people who slow down on the prep and the mixing. Get those two things right clean absorbent brick, consistent dilution ratio, damp surface before every section and the application itself is straightforward. Rush either of them and no amount of technique fixes it afterward. The five-day reversibility window is genuinely useful, but in practice most people who prep properly don’t need it. Do the test area on a hidden wall first, develop your ratio, then work toward the front. By the time you reach the most visible section, you’ll know exactly what you’re doing.
FAQs
Limewash is a mineral-based coating made from slaked lime and water that absorbs into porous brick instead of forming a surface film. This allows the masonry to remain breathable while creating a soft, matte finish that develops character as it ages.
Limewash is a good choice if you want a breathable finish that can gradually fade and remain reversible shortly after application. Whitewash uses diluted latex paint, while German smear uses mortar and creates a much more permanent finish.
Spray a small area with water and watch how the surface reacts. If the water absorbs quickly, the brick is generally porous enough for limewash; if it beads on the surface, an existing paint or sealer may prevent proper bonding.