
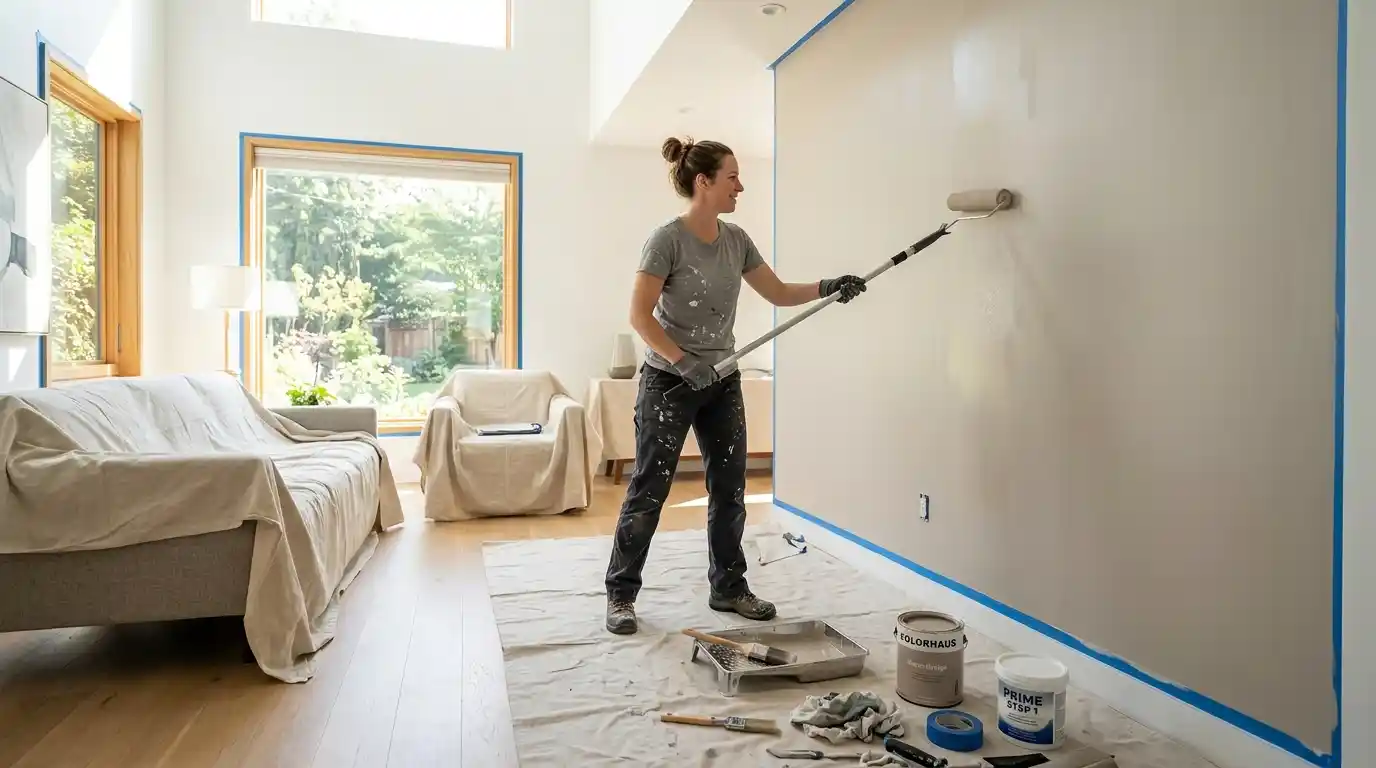
First of all, when I decided to paint my walls for the first time without preparing them properly, I realized the hard way how costly mistakes with bubbles can be. I did not bother to clean the walls properly, rushed while applying tape, and put two generous coats of paint on the walls that still retained a layer of grease around the electrical switches.
As early as a week after finishing the project, some areas started to peel off. The second time I undertook to paint the room, I took preparation seriously, since it is the real thing. Harris Brushes states that 70 percent of your end result depends on the preparation process, no brushes included yet. Painting a room is easy when you know how.
How to Paint a Room the Right Way: Preparation Comes Before Everything
Most people underestimate prep work because it is time-consuming and unglamorous. However, skipping or rushing it guarantees problems that cost more to fix than the time you saved.
Setting Up the Room Before You Open a Single Can
One of the first things to do when learning how to paint a room is to get rid of everything in that area completely. It is best to remove all furniture from the room whenever possible. The bigger furniture items should be moved towards the center of the room and covered with canvas sheets or plastic sheeting. The importance of getting rid of things on the floor is as important as getting rid of things on the walls, where you need to tape dust sheets to the floor using masking tape, and then secure one edge of the sheet to the wall using UV tape to prevent paint getting into the floor or skirting boards.
Whenever the skirting boards will be painted, you should tape the sheeting to the carpet, pressing the tape edge underneath the skirting boards to have the carpet settle well against the skirting boards.
Cleaning, Repairing, and Priming Walls Correctly
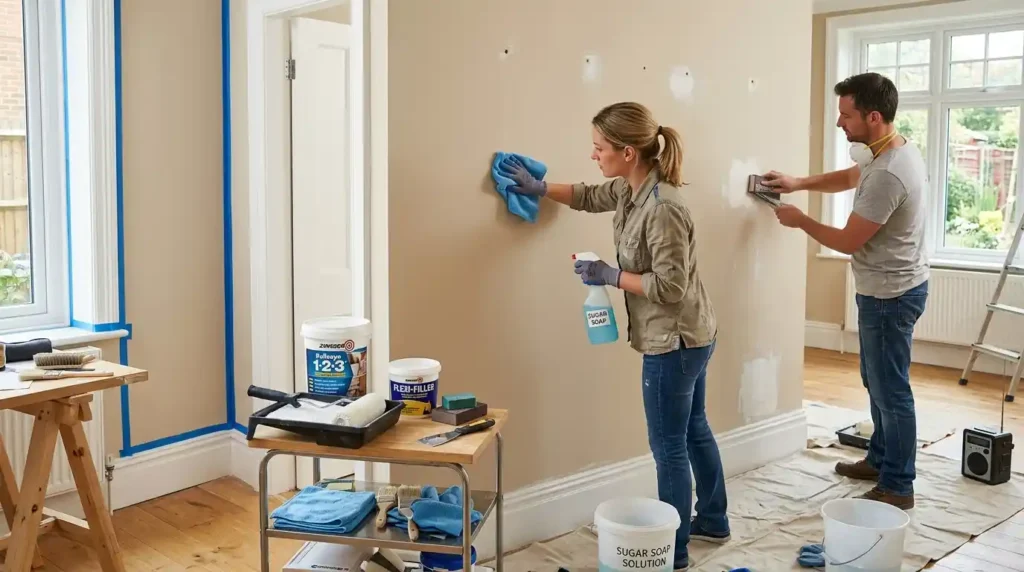
Before you even start with applying primer and paint, check all surfaces. Look for cracks, holes, imperfections and damages by moisture. Fill the cracks with suitable wall filler, sand them and clean the surface with duster after that. Clean the whole surface of walls using sugar soap and microfibre cloth, especially those parts that are located close to the light switches and plug sockets since this is where grease and finger prints may build up. Detergent can be used for light cleaning, but sugar soap will work better for old walls covered with greasy dust.
Walls should be totally dried before moving forward. Apply primer when you need to change color from dark to light, apply paint on new drywalls, cover the stains and create wood wall treatment. Thin coats are the way to go, since thick coats will lead to paint bubbles which will peel off later.
The Correct Order to Paint a Room From Ceiling to Skirting
Experienced decorators stick to one sequence regardless of the room: ceiling first, walls second, trim and skirting boards last. That order exists for a reason, and knowing it saves significant touch-up time.
Why Ceiling First Prevents Wasted Work
The correct way to begin when painting the room is to start with the ceiling, since the paint that will drip during the process will drip onto the wall surfaces that have not been painted, and thus cannot be damaged in this process. The sequence is used by professionals in Rawlins Paints for the residential and commercial painting jobs, such as in houses, offices, retail stores, and coffee shops. In order to paint the ceiling, use a roller with an extension pole and paint the ceiling with a W or M pattern to keep a wet edge.
Put the painter’s tape on the place of intersection between the wall and the ceiling prior to painting the ceiling. After the drying of the ceiling, you can begin painting the walls. Painter’s tape should be used in the areas where different surfaces meet at intersections between walls and trim, at baseboard, window frame, and door frame. Do not remove the painter’s tape after the drying of the paint, as you may damage the painted surface.
Cutting In Before Rolling and the One Section Rule
Cutting in is the procedure where the walls are painted by using a brush which cuts at an angle, before rolling the rest of the wall surface. Paint the edges using an angled paintbrush after filling a hand-held paint bucket with paint. Paint around all taped edges along windows, door openings, ceiling edges, baseboards, and corner edges, about six inches from the edge.
The main thing which differentiates the professional quality painting from the amateur one is that it is done section by section, with the tape being removed as soon as you are done cutting in that particular section. Paint the edges around the window, remove that tape, go to the door and remove its tape, then go to the baseboard and paint one section of it. This will ensure that your paint does not dry while still under the tape.
Finishing, Drying, and Second Coats Done Right
Knowing how to paint a room includes knowing when to stop and let the paint work. Rushing second coats or cleanup creates avoidable problems at the final stage.
Second Coat Timing and What Professional Results Actually Require
Let the first coat of paint completely dry, which can take anywhere between 2 to 4 hours depending upon the quality of paint used, amount of humidity present in the room and the level of ventilation. The vast majority of rooms would require a second coat irrespective of how well the first coat looks while being applied. There is considerable change in the appearance of paint when it dries, and a second coat adds depth and evenness to the overall look of paint application.
Apply the same technique of cutting-in before applying the second coat as done previously for the first coat. Therefore, remove all the tapes from the walls while the second coat of paint is still wet. In case if there is any tape left in place once the paint has dried out, then pull it off from the wall at an acute angle to prevent paint lifting. Look into all the edges, corners, and cut-in lines after the second coat dries out, and use a small angled brush along with the remaining paint to correct any thin patches or brush strokes.
Cleaning Tools and Restoring the Room
When painting has been finished, rinse the tools immediately while paint is still fresh on them. Rinse the tools first with a garden hose, then wash in soapy warm water until water runs clear. Store brushes either flat or suspended bristles down in order to keep the shape of the brushes. Place outlet covers and switch plates only when walls have dried completely in order not to mark the new paint. Return curtains to their proper places, place furniture back, and check once more to see if there is any part that should be touched up; then store remaining paint safely.
Conclusion
How to paint your room properly begins and ends with preparation. This involves cleaning the walls, using primer when necessary, applying the correct tape, the right order for painting, thin layers, immediate removal of tape once done, and taking care of the tools used after finishing the work. That is how one achieves a professional paint job which will not begin to peel off in the next few months. The actual painting itself only takes a few hours.
Frequently Asked Questions
In what sequence should you be painting the room?
First, paint the ceiling, then walls, then the trim and skirting boards. When starting with the ceiling, if there will be any drops of paint, it will fall onto an untouched surface. Moreover, completing the walls before painting the trim allows protecting dry walls while working on the latter.
Should you apply a primer prior to painting a room?
No, this is not always necessary. If you do not plan to change the current color of walls or walls are in good condition, primer may be skipped. However, primer is used in case of painting light colors over dark ones, bare/new drywall, stain concealment, or paint application after wood preparation.
When do you remove painter’s tape?
It is best to remove painter’s tape before the paint dries. Removing tape from completely dried paint may result in pieces of the paint being removed along with the tape, thus causing an irregular edge. Paint each area and immediately remove the tape of that area while the paint is still wet.
How long does it take to paint a room?
The time it takes to paint a room depends on doing it right a half day for preparation, a few hours for the first coat and cut-ins, 2 to 4 hours drying time, then a second coat the next morning. Drying times between coats of paint are essential otherwise poor paint quality results. It should take a whole weekend for this task.